
Galaxy Panoramic

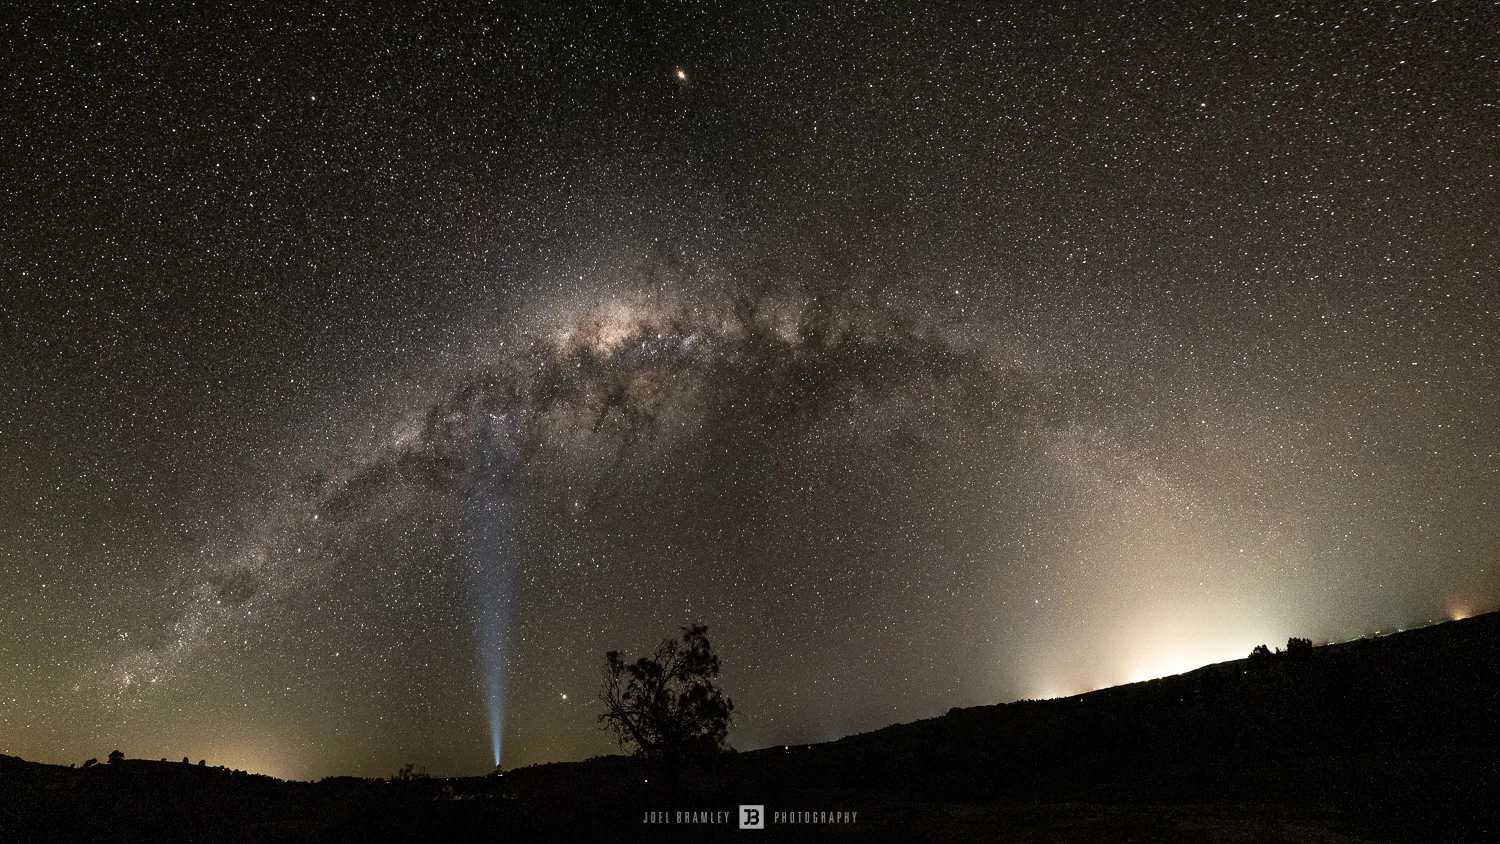
Final edit with the Milky Way spanning from Melbourne to Bendigo
Last night I headed out to shoot the stars with @jared_scott_imagery to one of his favorite locations of late to see what we could capture. The night was very clear which meant it was on the cool side too. With nothing protecting us from the wind it got cold pretty quick.
After a 15-20 drive we got the the location and from it you can just make out the Sacred Heart Cathedral in the glow from the city lights of Bendigo on the right of the image above.
This was my first real attempt at capturing the Milky Way like this and I made a mistake while capturing images that I know about but was just excited and amazed to be in the location and seeing the stars overhead that it slipped my mind. This would come back to haunt be shortly.
It was just before 11pm when we arrived and the core was still quite high above the horizon but not so high to affect the photos that much. Around 2am would be ideal but there was work the following day (today).
I got back home a little after 12am knowing that I had to see how my panoramic looked, even if it was a quick edit otherwise there's no way I could get to sleep. Forty minutes later I was in bed, turned out to be not so quick!
Lightroom stitch after pushing the Boundary Slider all the way to the right (removes roundness)
I was taking photos with my 7-14mm wide angle at 7mm and took a sample photo to check the focus and exposure. The core was getting close to the top of the frame so I angled the camera so it captured more sky and less ground. Sounds like the right thing to do but from my experience this causes problems when it comes to stitching later on when using a super wide angle lens.
At 7mm wide it really only stitches well when the lens is parallel with the scene, but when you put the lens on a steep angle you get the below result in Photoshop and Lightroom.

How Photoshop initially stitched the images together
With Lightroom you have an option to try and remove the roundness from the stitched image but you can only go so far, this is why it looks wrong and the hill on the right was not that big. (see two above)
When shooting panoramic images I mostly shoot in portrait orientation to capture the most data I can as the vertical is limited yet the horizontal is only limited to how many photos I want to take.
For this one I took a lot more than what was needed mostly due to the fact that you can't really see what you are framing for each frame and each one had plenty of overlap. In the stitch the final image is made up from 3-4 of the 9 photos.

Using the Warp adjustment tool to reshape the panoramic in Adobe Photoshop
Above shows roughly how I reshaped the image using the Warp Adjustment Tool in Adobe Photoshop to fit what I was actually seeing when capturing, next time I'll remember this so there will hopefully be a lot less work in Photoshop to get the result I was after.